INSTRUCTIONS FOR THE SCHOOL/INSTITUTE ADMIN
SIGN-UP PROCESS : (If you have already signed-up, skip this and go to settings)
1. Sign-up from the lovemytest.com home page as new user
2. Select you profile as a School or Coaching Institute
3. Fill the required information, add your own login-ID and password and register.
4. Your loginID and password is created and an activation mail is sent to your email-Id.
5. Check on your mail-ID and click on the activation link to activate your admin account.
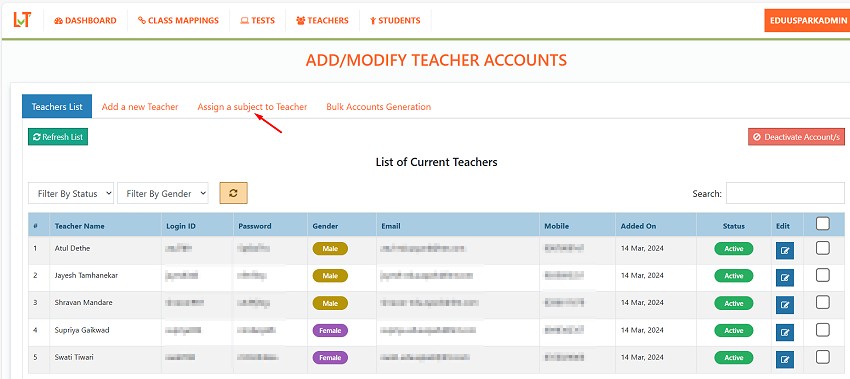
6. Map the required classes and subjects required at the school level.
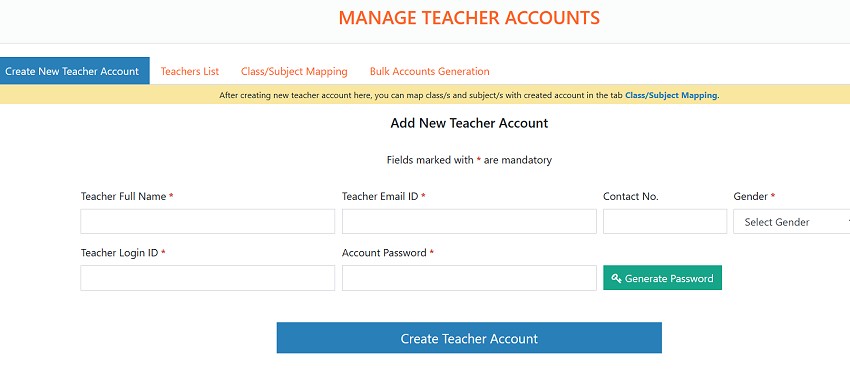
7. Create a Teacher ID.
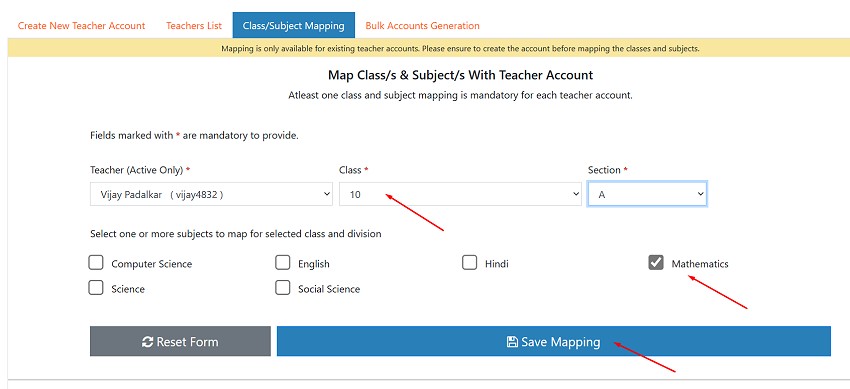
8. Assign/map the required class and subjects for the teacher.
9. Login with the teacher ID to create question papers as well as conduct online tests.
10. The admin account is only for administrative tasks, you need to create a teacher account to make question papers and conduct online exams. You can create multiple teacher accounts as needed.
11. Login to your admin account from where you can do various tasks like mapping the classes and subjects, adding teachers, adding students and take paid subscriptions.
12. If you have forgotten your password, please use the forgot password option on login page to reset your password. If you do not remember your loginID, please whatsapp us on 7829151919 with your registered mail id and we will share your loginID after verification.
Admin Account First Time login: (If you have already set this, skip this and go to Dashboard )
Login as with admin from lovemytest.com login menu
When you login for the first time as a admin, you will need to set the classes and subjects required for your school or institute. If you have registered yourself, you can click on "Select the classes and subjects " to set classes and subjects available. If your registration was done by the LMT team, class/subject-mapping would be already done as required by you.
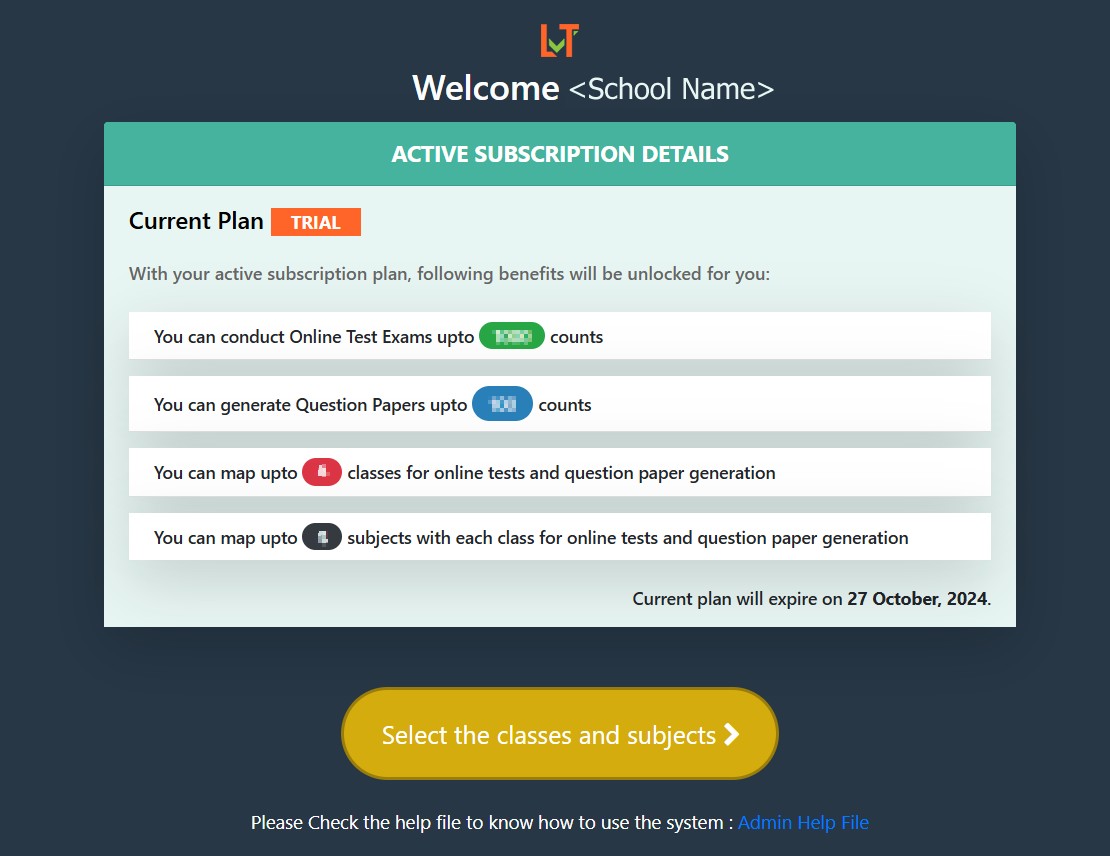
Above screen will be visible only when you login in trial mode, else you will be taken directly to the dashboard.
CLASS AND SUBJECT MAPPING:
You can map the required class and subjects as allowed in your package from the 'Manage Class Mapping' menu on the dashboard. By default, NCERT books are available for mapping, If you need to add any other books or curriculum, please contact our support team.
Please note that class-subject mapping is done for the entire school. For individual teachers, you need to assign/map the required classes and subjects from the one mapped at school level. Please refer to the 'Create Teacher IDs' section to create a teacher ID and assign subjects to teacher.

GO TO ADMIN OR TEACHER MODULE:
After you set the classes and subjects, you can go to the Teacher Module to create exams, or you can go to the Admin Module to create more teacher IDs and do other settings.
By default, a teacher ID is mapped to your admin ID, which you can use to create tests as a teacher. You may see this teacherID as 'adminID-t' in your teacher list. 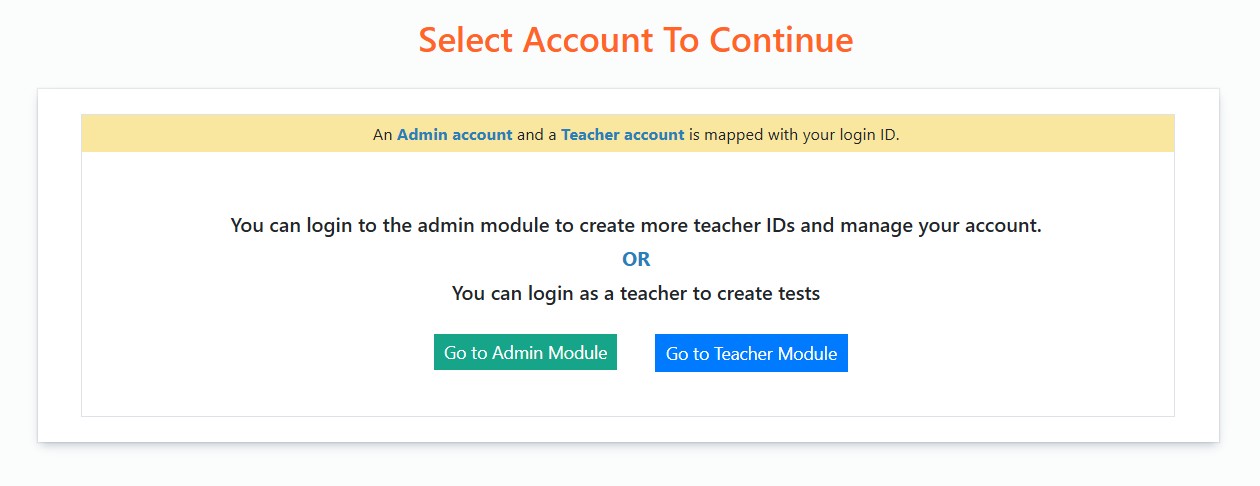
To know how to use the teacher module, you may go through the Demo Video
ADMIN DASHBOARD:
You will reach the admin dashboard on your next login, or you can move to admin module after the initial class-subject selection. You will have various options as shown below on the dashboard. You can also switch to the Teacher module directly from here.

|